As third quarter comes to a close and classwork starts to look towards summer, student creativity can take a dive. However, there are a plethora of options for a crafty person to impress their friends with and show they won’t fold under pressure.
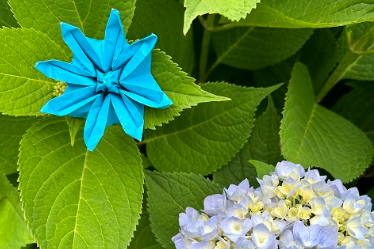
One of the most iconic forms of art is origami, the Japanese tradition of folding paper into intricate shapes and designs. This article is a step-by-step guide to a beautiful daisy, but be warned: this flower is incredibly complicated, requires near-perfect folding, and leaves almost no room for error. It may leave more creased brows than creased paper. At the same time, patience and dedication can produce a beautiful flower that’s perfect as a table centerpiece or a gift for a loved one.
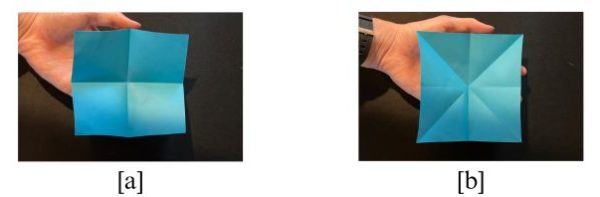
1) For the first step, make sure to have a perfectly square piece of paper. The size doesn’t matter for the result, but smaller dimensions make it harder. Take it and fold it horizontally, vertically [a] and diagonally in both directions [b].
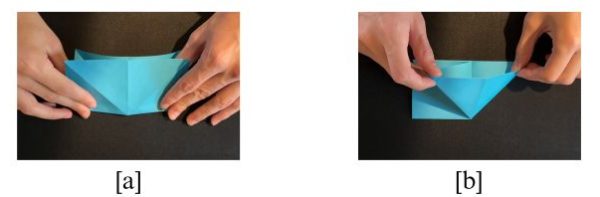
2) At this point, pick any side to be the top. Fold the bottom edge to the top (horizontal line) [a]. Then, while keeping the center line in the middle, fold the top right corner to the top left, creating a triangle [b]. Repeat this on the opposite side.
3) Fold the right edge of the triangle to the center line and crease as hard as possible [a]. Unfold it, then reverse fold so that the flap at the top is inside the fold [b]. Repeat on the left side, and then both sides on the back [c].
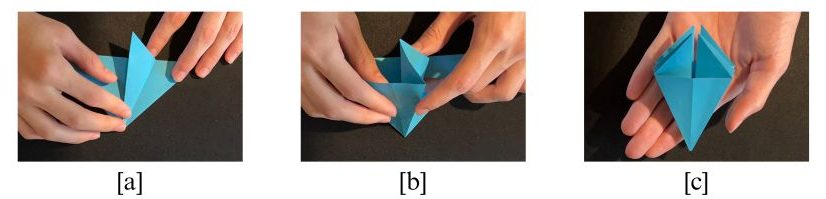
Before continuing, make sure that of the eight layers of paper, four are on the left and four are on the right. From here on out, there should always be four on each side.
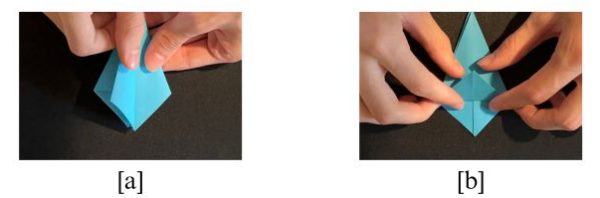
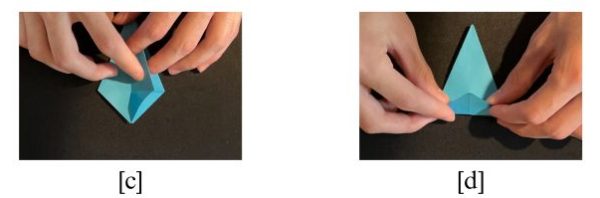
4) Flip the paper so that the top is now at the bottom, and flip one layer over [a]. Now you should have a solid triangle at the new bottom, instead of one with a line through the middle. Fold this up and repeat on the other side [b]. Now flip two more layers over and repeat again [c][d].
5) Now for the repetitive part – take the bottom of the triangle (if it’s pointing up) and fold it to the left side, but only crease from the left side until the midway line on the triangle [a]. Do this again to the right side [b]. Now fold one layer over and repeat 5a and 5b again, and again, and again, until all eight possible “sides” have been dealt with.
6) Fold the top corner straight down the middle to about halfway between the fold marks and the bottom [a]. It does not have to be exact. Unfold it, flip the daisy over and repeat the fold, making sure to completely flip the crease over and to not just make a new crease right above or below (this is a common mistake). Fold over two layers and repeat once more on the front and back [b][c].
7) Unfold everything except the corners.
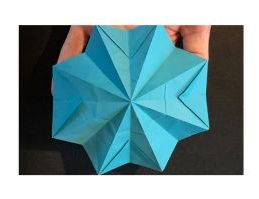
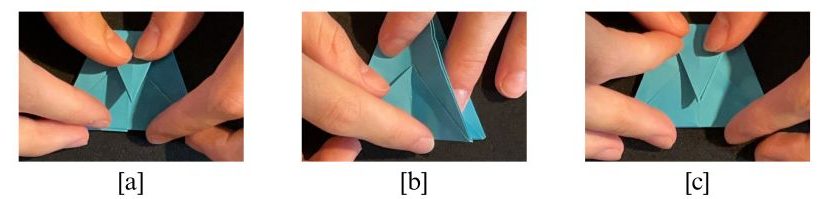
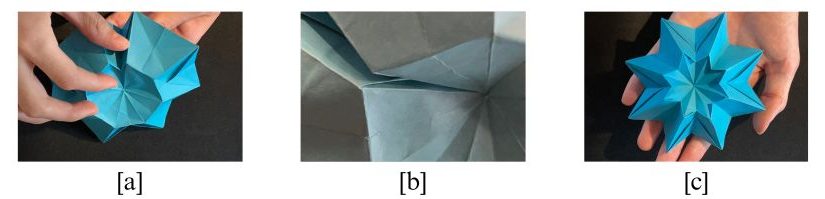
8) Go over and strengthen all the creases that currently exist. This is especially important on the center folds that make an octagon [a]. Other helpful creases to refold are the downward folds outside the octagon [b] and the upward folds inside the octagon [c].
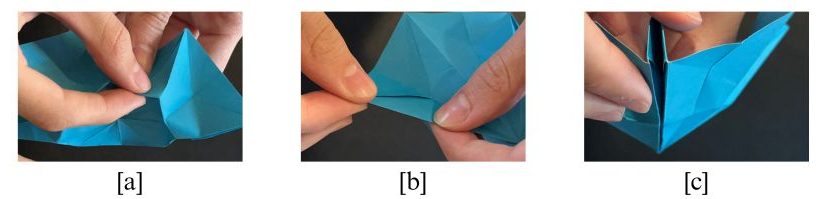
9) Pick any side of the octagon. Fold the center of the line towards the center while also folding the two upward folds on either side of it [a]. Crease it hard and unfold. The new fold should be even in height with the old folds [b]. Do this with the other seven sides [c].
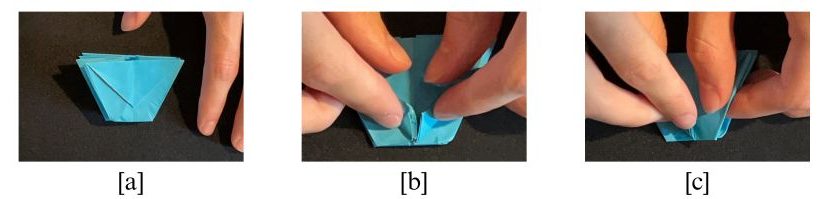
10) Angle the flower so that one of the folded triangles is close to you [a]. Refold all the creases that were made in Step 9 at the same time [b][c], so that a singular trapezoid is created [d]. It should have eight layers like earlier.
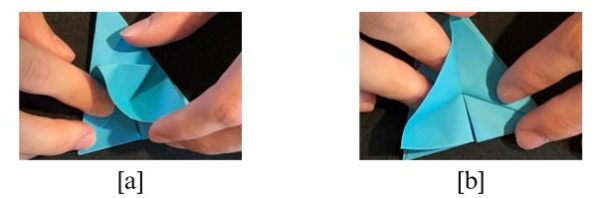
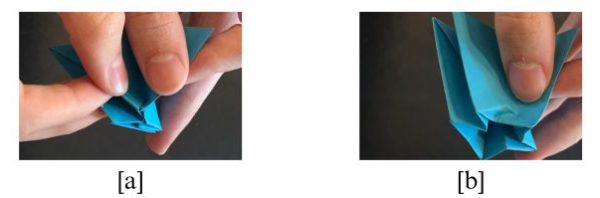
It is at this point that one of two things may happen. Either Step 10 was performed perfectly, meaning that all eight layers can be flipped around freely, or a slight mistake occurred, in which every other layer is stuck to its neighbor. To fix this, find the part of the fold that is stuck, and very lightly pull at it until the snag pops loose [a], then refold it into position [b].
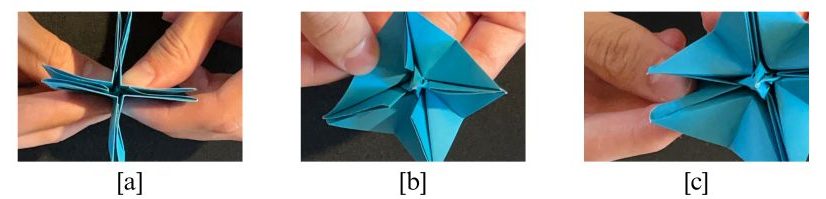
11) Rotate the trapezoid so that the smallest side is towards you [a]. Fold the bottom corners to the center [b]. Repeat on the back, then flip two layers over and repeat again [c].
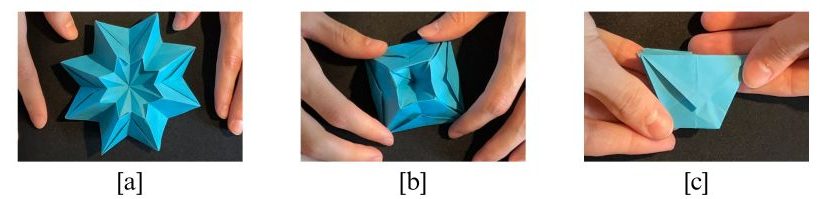
12) Pick up the flower so that from above it looks like a plus sign [a]. Each “limb” should contain two layers. Take the paper that connects two limbs, fold it out, and crease it [b]. Take the paper inside each limb, and fold into itself [c]. This should create the eight petals.
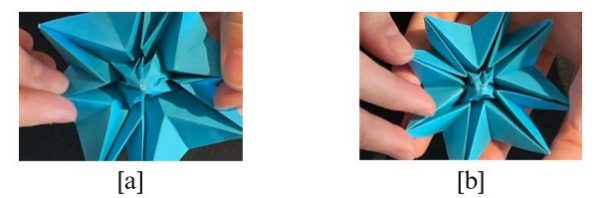
13) Pull lightly on each petal to expand the central circle [a], and try to space the petals out equally around the flower [b].
14) Choose one petal to start, and fold it outward so that it looks like an actual petal. Do this for all of the petals.
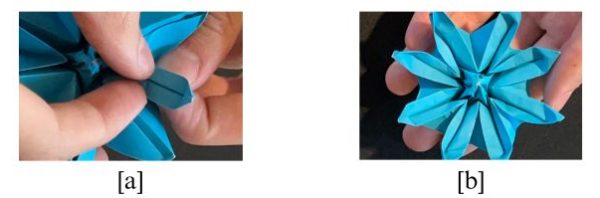
Congratulations! There should now be a paper daisy in your hands. If all the steps were followed correctly, it should look like a stunning daisy, worthy of display. If not, don’t give up and give it another try. If this was too difficult, there are thousands of other ideas out there that still look amazing for creative decoration. Origami is meant to be something that is practiced and repeated multiple times until it is perfect. This could be a great way to start the spring season.